

Okay, so the fantasy football draft was coming up, and honestly, scribbling names on the big board last year was kind of a mess. Hard to read, slow, smudged. I figured, this year, I’d get it sorted properly. I decided to make some decent labels for all the players.

Getting Started – What Did I Need?
First off, I needed a solid list of players. You know, the usual suspects plus some deep sleepers. I grabbed a few different rankings from online fantasy sites, kinda cross-referenced them to make sure I wasn’t missing anyone important. I ended up dumping everything into a spreadsheet, seemed easiest.
In the spreadsheet, I set up columns for:
- Player Name
- NFL Team
- Position (QB, RB, WR, TE, K, DEF)
- Bye Week
That felt like enough info for the draft board. Didn’t want it too cluttered.
Making the Actual Labels
I thought about just printing on paper and cutting strips, but that sounded like a ton of work and probably wouldn’t look great. So, I went and bought some basic sticky labels. Address label size, maybe a little bigger? Can’t remember the exact Avery number, but they were rectangular and a decent size.
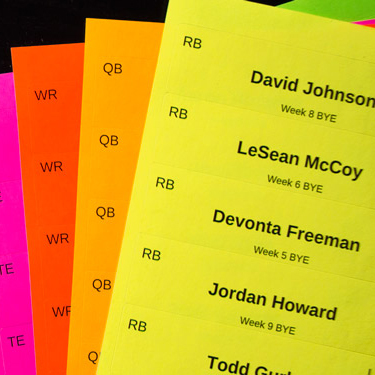
Back in my spreadsheet program (just used Google Sheets, nothing fancy), I started formatting. I wanted the player’s name big and bold so you could see it from across the room. Then the Team, Position, and Bye Week smaller underneath.
Here’s a little trick I did that helped a lot: color-coding by position. Made spotting players way faster during the draft frenzy.
- QBs: Blue background
- RBs: Green background
- WRs: Yellow background
- TEs: Orange background
- Kickers & Defenses: Just plain white, kept it simple.
Setting this up in the sheet took a bit of fiddling, getting the text size right and the colors applied to the right rows. Had about 300 players total when I was done.
Printing Time
Now, printing labels can be tricky. Alignment is key. I learned this the hard way before. So, first, I printed a test sheet onto plain paper. Held it up against the label sheet to the light to make sure everything lined up in the boxes. Had to tweak the margins a tiny bit in the print settings, but got it right after the second try.
Then I loaded the real label sheets into the printer. Did it in batches, checking each sheet as it came out to make sure the alignment didn’t drift. Took a little while, but it worked fine.
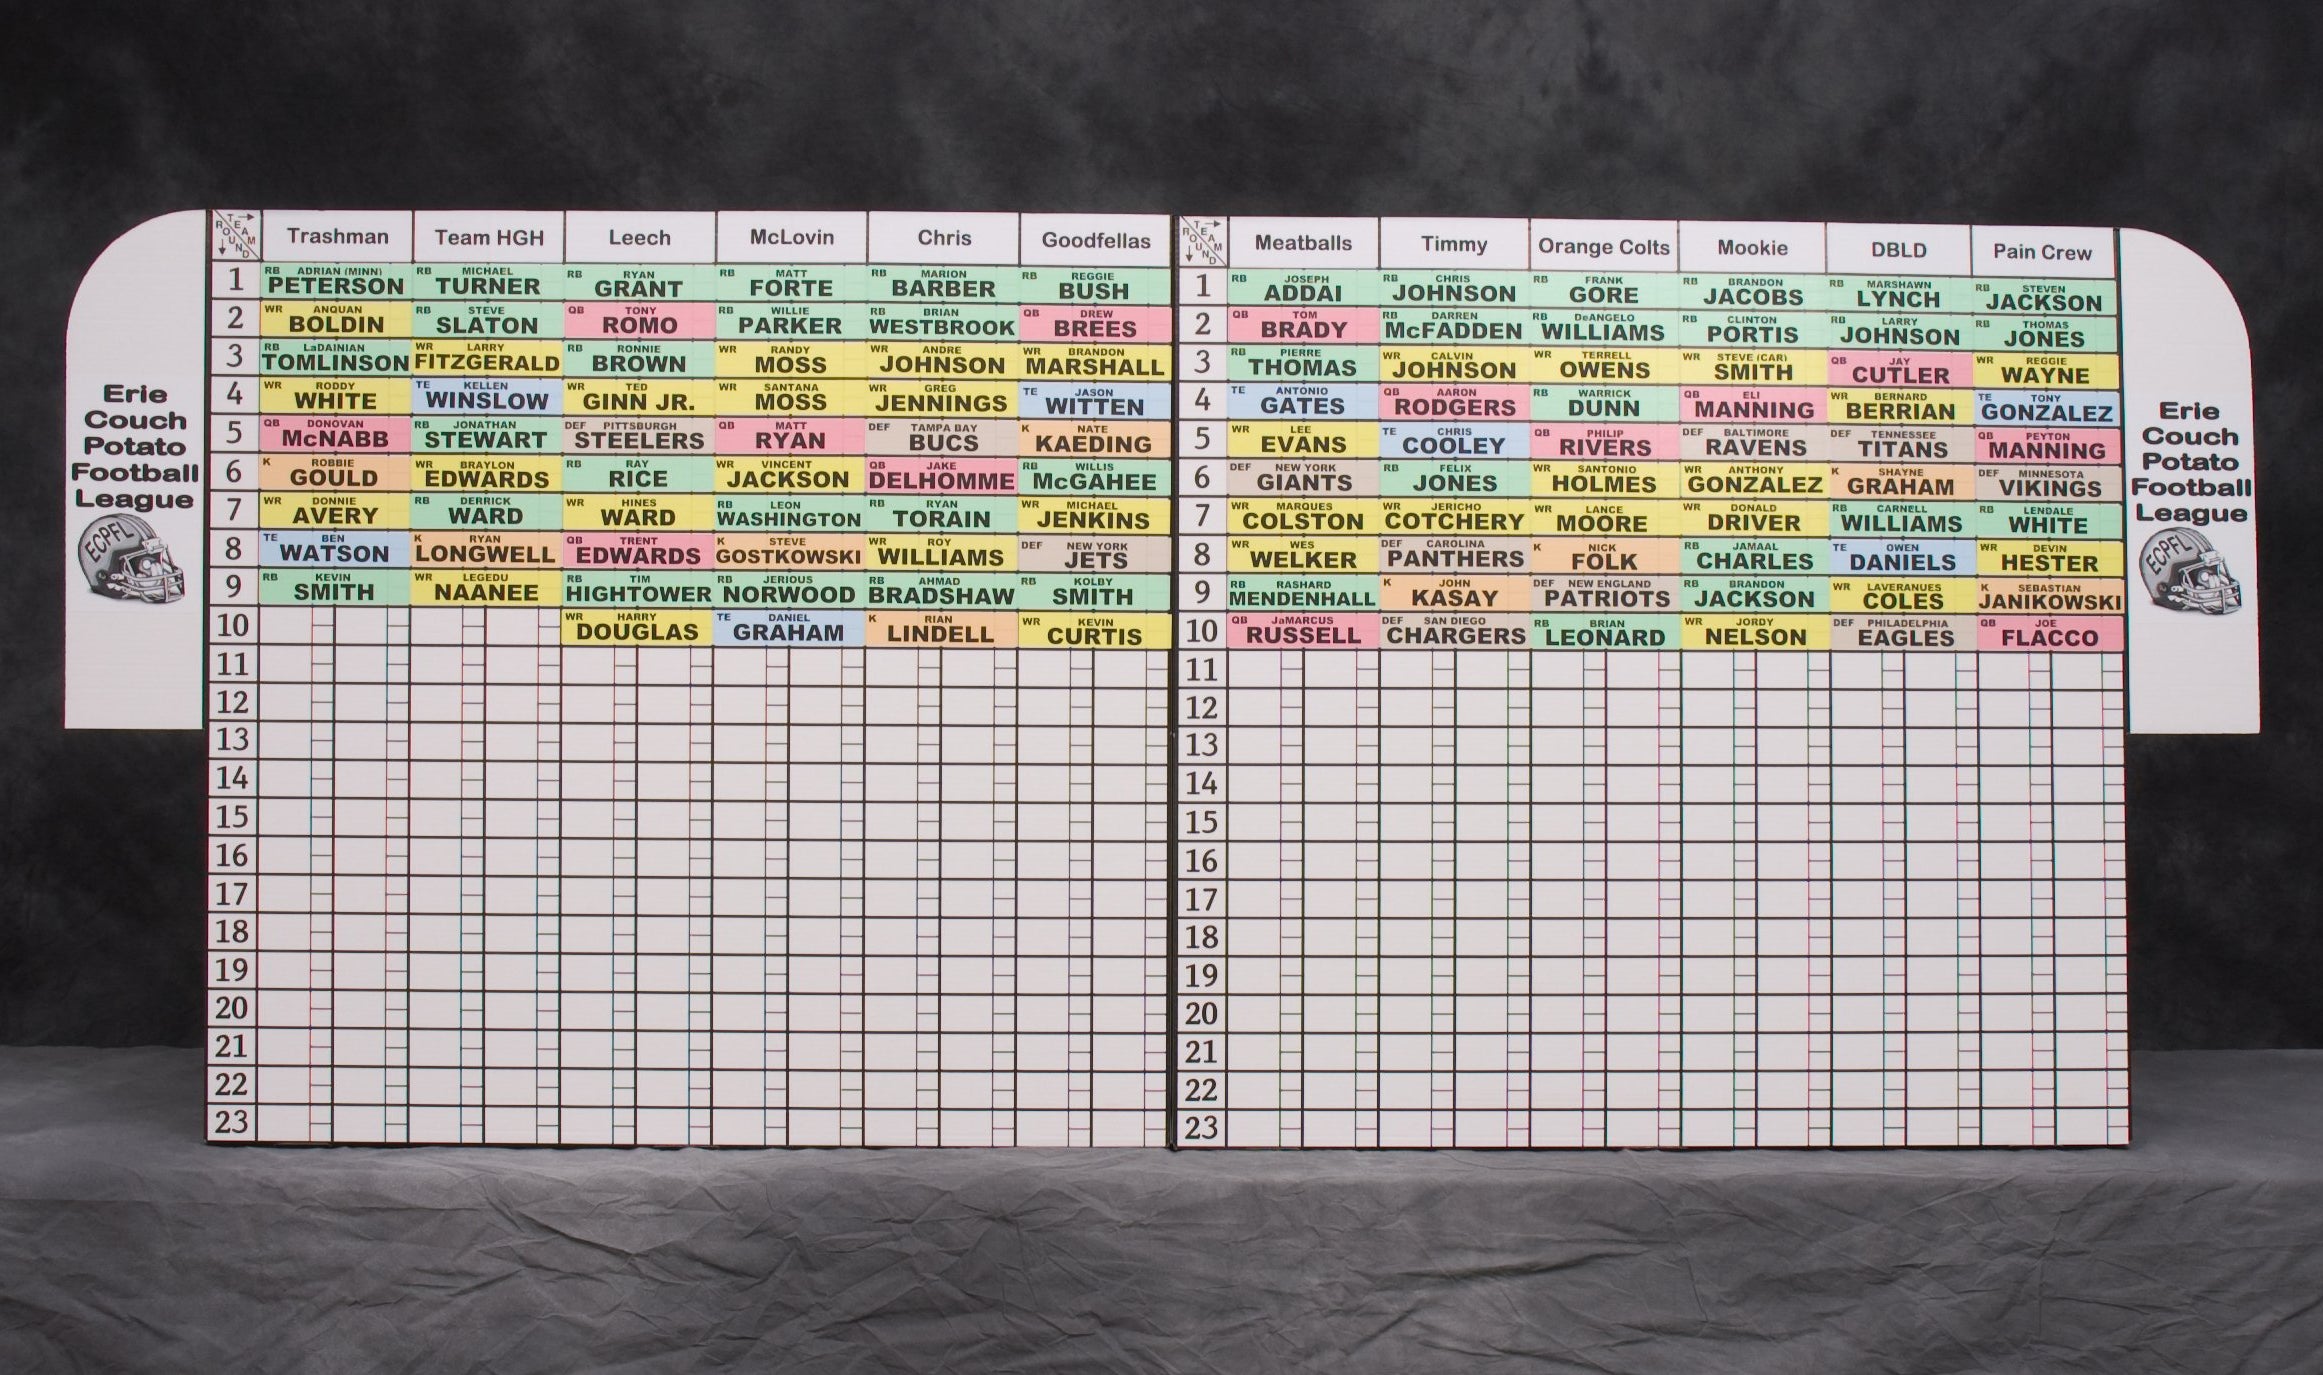
The Final Product
Ended up with several sheets of nice, clean, color-coded player labels. Way better than my usual chicken scratch. On draft day, it made a huge difference. People could easily see who was available. When a player was picked, we just peeled their label and stuck it onto the big draft board under the right team name. Looked sharp, felt organized.
Honestly, it wasn’t that hard to do, just took a little bit of planning and spreadsheet work. Definitely doing it this way again next year. Made the whole draft experience smoother.


