

So, why did I bother with electrical box covers? My basement was looking rough, man. The old ones were broken and dusty, and I thought, hey, it’s time to clean things up fast. I hate complicated stuff, so let’s do this easy way.

Getting Started with Supplies
Okay, first I drove to the hardware store. Grabbed a couple of new electrical box covers – I picked plastic ones ’cause they’re cheap and simple. Then, I rummaged through my toolbox. Found a basic screwdriver, some screws that came with the covers, and a raggedy old rag to wipe off dust.
Removing the Old Mess
Kicked things off by shutting down the power switch. Safety’s boring but necessary, right? Then, I pulled out the screwdriver and started unscrewing the screws on the old covers. It took some muscle – one screw was stuck like glue! I twisted it back and forth until it popped off. Peeled away the cover slowly, just in case it was brittle.
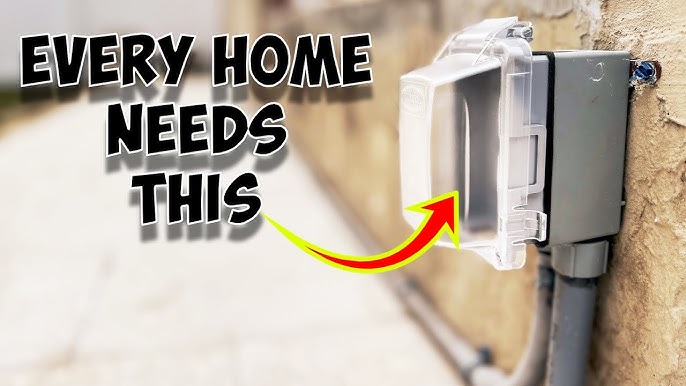
Putting the New Ones On
Next up, cleaning the area. I wiped down the boxes with that old rag – tons of cobwebs flew everywhere, nasty! After that, I took a new cover and held it against the box. Squared it up real quick to make sure it wasn’t crooked. Then, pushed in the screws using the screwdriver. Turned them clockwise, tight but not too hard. Did this for all the boxes one by one.
When Things Went Wrong
Not gonna lie, I messed up a bit. Dropped a screw under the workbench – had to crawl on my knees to find it. Another time, the cover didn’t sit flush ’cause of dirt. Solution? I blew on it like a caveman to clear the gunk out.
Finishing Up
Finally, turned the power back on. Everything worked! The covers looked smooth and professional. Whole thing took me under an hour, way faster than I expected. And yeah, it ended up being pretty easy once I stuck with it. No headaches, just a simple job done right.


